


When most people think about woodworking, they imagine grabbing a piece of lumber, measuring twice, and cutting once. But there’s a whole layer of precision and planning that separates weekend hobbyists from master craftspeople — and that layer is blueprint woodworking. Whether you’re designing custom cabinetry, planning a furniture build, or mapping out an entire room transformation, woodworking blueprints give you the visual clarity and dimensional accuracy needed to bring your vision to life. In this comprehensive guide, we’ll walk you through everything from beginner-friendly blueprint basics to advanced drafting strategies that professional woodworkers use every day. If you’ve ever wanted to read, create, or use woodworking blueprints like a pro, you’re in the right place.
What Is Blueprint Woodworking?
Blueprint woodworking refers to the practice of creating and using detailed technical drawings — blueprints — to plan, visualize, and execute woodworking projects. These drawings serve as a roadmap for every cut, joint, and assembly point in your build. Unlike a simple sketch on a napkin, a proper woodworking blueprint includes precise measurements, material callouts, grain direction indicators, and assembly sequences.
Historically, blueprints were literal — white lines on blue paper produced through a chemical process called cyanotype. Today, the term has evolved. Modern woodworking blueprints can exist as digital CAD files, PDF plans, or hand-drafted sheets, but they all serve the same fundamental purpose: giving the woodworker a clear, unambiguous guide before any wood gets cut.
Key elements commonly found in woodworking blueprints include:
- Orthographic projections — front, top, and side views of the piece
- Exploded assembly diagrams — showing how parts fit together
- Dimension lines and tolerances — exact measurements with acceptable variance
- Material and hardware specifications — specifying wood species, fasteners, and finishes
- Joinery details — dovetails, mortise-and-tenon, dowels, or pocket screws

Why Blueprint Woodworking Matters for Your Projects
Skipping the blueprint phase is one of the most common mistakes amateur woodworkers make. Without a plan, you’re essentially guessing — and guessing leads to wasted materials, misaligned joints, and frustrating redesigns mid-build. Here’s why investing time in blueprint woodworking pays off enormously:
- Cost savings — Accurate plans prevent over-ordering lumber and hardware. You know exactly how much material you need before you visit the lumber yard.
- Fewer errors — When every dimension is pre-calculated, there’s far less room for measurement mistakes during the actual build.
- Better communication — If you’re working with a partner, client, or workshop team, blueprints ensure everyone shares the same understanding of the final product.
- Repeatability — Want to build a second version of your dining table? A solid blueprint makes replication straightforward and consistent.
- Complexity management — For intricate projects like built-in bookcases, kitchen cabinets, or curved rocking chairs, blueprints break complexity into manageable steps.
Getting Started with Blueprint Woodworking: A Beginner’s Guide
If you’re new to woodworking blueprints, the learning curve is gentler than you might think. Start by understanding the types of drawings you’ll encounter and how to interpret them.
Understanding Blueprint Symbols and Markings
Every trade has its own visual language, and woodworking is no exception. Blueprints use standardized symbols to communicate information quickly. For instance, a circle with crosshairs typically indicates a hole center, while hatched areas represent cut sections. Familiarize yourself with common woodworking blueprint symbols before diving into a full project.
Here are some essentials to learn first:
- Section lines — Indicate where a part has been “cut” to show internal structure
- Center lines — Mark axes of symmetry or hole centers
- Hidden lines — Dashed lines showing edges not visible from the current view
- Leader lines — Point from notes or callouts to specific features
- Scale indicators — Tell you if the drawing is full-size, half-size, or at another ratio
A great way to practice is to pick a simple project — like a small shelf or a basic stool — and try sketching its blueprint by hand. This exercises your spatial reasoning and helps you internalize how two-dimensional drawings translate into three-dimensional objects.
Intermediate Blueprint Woodworking: Scaling and Measuring

Once you’re comfortable reading basic blueprints, it’s time to tackle scaling — the process of converting blueprint dimensions to real-world measurements. Most woodworking blueprints are drawn at a specific scale, commonly 1:4 or 1:8 for furniture plans, meaning one inch on paper equals four or eight inches in reality.
To accurately measure from a scaled blueprint, you’ll need:
- A scale ruler (also called an architect’s scale) with multiple ratio markings
- A steel ruler for smaller, precise measurements
- A calculator for converting fractional inches and applying scale factors
Always double-check your readings. Measure each dimension at least twice, and cross-reference the blueprint’s parts list against the physical pieces as you cut. This habit alone will save you from the most costly beginner errors.
At this stage, you should also start experimenting with digital tools. Software like SketchUp, Fusion 360, and even free options like LibreCAD allow you to create digital blueprints with snap-to-grid precision, automatic dimensioning, and the ability to rotate views for a 3D perspective.
Advanced Blueprint Woodworking: Custom Design and Drafting
At the advanced level, blueprint woodworking becomes a creative discipline in its own right. Professional woodworkers, furniture designers, and custom cabinet shops develop their own blueprint systems tailored to their workflows. This involves creating custom templates, establishing proprietary joinery libraries, and developing standardized notation systems for recurring design elements.
Drafting Your Own Blueprint from Scratch
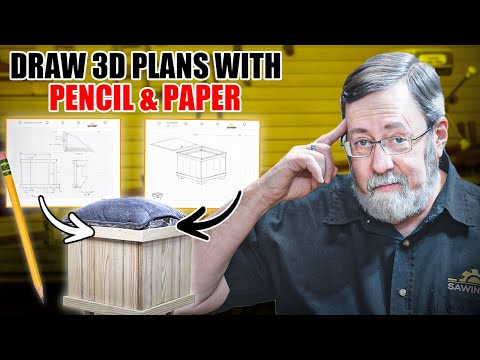
Creating a blueprint from a concept involves several deliberate steps:
- Define the project scope — Write down every component the finished piece requires: panels, legs, shelves, doors, hardware, etc.
- Sketch rough orthographic views — Draw the front, top, and side views with approximate proportions.
- Add dimensions systematically — Start from a common reference edge (usually the bottom-left corner) and dimension every feature. Avoid chaining dimensions end-to-end; instead, use datum dimensioning for accuracy.
- Detail joinery and assembly — For each joint, specify the type, size, and orientation. Include assembly order if the sequence matters.
- Create a materials cut list — Extract every piece from your blueprint and compile it into a cut list with dimensions, quantities, and wood species.
- Review and revise — Walk through the blueprint mentally, visualizing the build. Check for conflicts, impossibilities, or oversights.
Advanced drafters also account for wood movement — the fact that wood expands and contracts with humidity changes. Your blueprint should indicate grain orientation on each panel to anticipate seasonal swelling and shrinkage, especially for large surface areas like tabletops and cabinet doors.
Blueprint Woodworking Tools and Resources
Having the right tools makes all the difference between drafting frustration and professional-quality output.
- Graph paper and technical pencils — For hand-drafted blueprints. Use 0.3mm and 0.5mm leads for fine detail work.
- Drafting templates and French curves — Essential for drawing consistent arcs, curves, and angled lines.
- Digital drawing tablets — Devices like Wacom tablets pair beautifully with CAD software for natural-feeling digital drafting.
- Laser cutters and CNC machines — Some advanced woodworkers generate CNC-ready blueprints directly, translating their designs into machine code for precision cutting.
- Blueprint holders and lighting — Even in the digital age, many workshops use illuminated blueprint stands for reviewing large plans during builds.
For free blueprint woodworking plan templates, several online communities and websites offer downloadable plans with full blueprint-style drawings. Sites like Popular Woodworking, Fine Woodworking, and various DIY forums provide plans ranging from simple boxes to complex furniture suites that include full technical drawings, cut lists, and assembly instructions.
Blueprint Woodworking vs. Traditional Woodworking Plans: A Comparison
| Feature | Blueprint Woodworking | Traditional Plans |
| Detail Level | Highly detailed — Every dimension, joint, and material specified | General — Often provides dimensions but skips technical details |
| Visual Format | Technical drawings — Orthographic projections, sections, details | Photographs and sketches — Often relies on images for guidance |
| Target Audience | Intermediate to professional woodworkers | Beginners and hobbyists |
| Customization | Easily scalable — Dimensions can be adjusted systematically | Fixed dimensions — Modifying requires significant guesswork |
| Error Reduction | Minimal — Precise tolerances and clear callouts reduce mistakes | Moderate — Relies on interpretation and visual estimation |
| Time Investment | Higher upfront — Requires reading and drafting skills | Lower upfront — Ready to follow with minimal study |
Expert Tips for Mastering Blueprint Woodworking
Take your blueprint woodworking skills to the next level with these tried-and-true recommendations from experienced craftspeople:
- Always draw full-size for critical joints. When a joint is complex — like a hand-cut dovetail or a curved mortise — sketch it at full scale on scrap paper before transferring to wood. This eliminates scaling errors on small features.
- Color-code your blueprint sections. Use colored pencils or digital layers to differentiate parts. Blue for shelves, red for legs, green for dividers — this speeds up on-the-fly reading during construction.
- Print blueprints at actual size when possible. Full-size printed sections let you lay wood directly over the blueprint for layout and cutting verification.
- Develop a personal symbol library. Over time, create your own shorthand for frequently used joints, hardware, and finishes. This speeds up your drafting and keeps your blueprints consistent across projects.
- Pair blueprints with mockups. Before committing expensive hardwoods, build a rough prototype from scrap or MDF. Compare the physical mockup against your blueprint to catch discrepancies early.
- Document revisions. Whenever you modify a blueprint during a build, mark the changes clearly with dates and revision notes. This prevents confusion if you reference the blueprint later.
Conclusion
Blueprint woodworking is more than a technical skill — it’s a mindset. It’s the commitment to planning before building, visualizing before cutting, and documenting before finishing. Whether you’re a beginner sketching your first stool on graph paper or an advanced craftsman generating CNC-ready CAD files, mastering the blueprint process will elevate every project you undertake. The time you spend creating a well-drawn blueprint is always paid back tenfold in reduced waste, fewer mistakes, and a final product that matches your vision with remarkable precision. Start today, practice consistently, and watch your woodworking transform from casual hobby to genuine craft.
Frequently Asked Questions About Blueprint Woodworking
What exactly is blueprint woodworking, and how is it different from regular woodworking plans?
Blueprint woodworking involves creating and using detailed technical drawings with precise dimensions, section views, and assembly diagrams to guide a project. Unlike simplified woodworking plans that often rely on photographs and basic measurements, blueprints provide comprehensive technical documentation including tolerances, joinery details, and material callouts that leave little room for interpretation.
Do I need professional drafting software to create woodworking blueprints?
Not at all. While professional tools like AutoCAD, Fusion 360, and SolidWorks offer powerful drafting capabilities, beginners can start with graph paper and technical pencils. Free or affordable digital options like SketchUp, LibreCAD, and Tinkercad provide excellent functionality for creating accurate woodworking blueprints without a steep learning curve or expensive subscriptions.
How do I learn to read woodworking blueprints effectively?
Start by studying sample blueprints from woodworking books or online plan libraries. Focus on understanding orthographic projections (front, top, and side views), section line conventions, dimensioning styles, and common symbols. Practicing by hand-drafting simple projects reinforces your understanding. Many community colleges and woodworking schools also offer short courses on technical drawing interpretation specifically tailored for woodworkers.
Can I use blueprints for small DIY projects like shelves or picture frames?
Absolutely. Blueprint woodworking isn’t exclusive to large or complex builds. Even a simple floating shelf benefits from a clear blueprint showing shelf dimensions, bracket placement, wall-mount locations, and wood grain direction. Creating a quick blueprint for any project — no matter how small — establishes good habits and prevents avoidable mistakes that come from working without a plan.
What scale should I use when drafting my own woodworking blueprints?
Common scales for woodworking blueprints include 1:1 (full size), 1:2 (half size), 1:5, and 1:10. Full size works best for detailed joinery drawings and smaller projects. Half-size or quarter-size scales are practical for larger furniture pieces where full-size drafting would require enormous paper. Always indicate the scale clearly on your blueprint so anyone reading it knows the relationship between the drawing and the actual piece.
How can blueprint woodworking help me save money on my projects?
Blueprint woodworking dramatically reduces material waste because you know exactly how much lumber, hardware, and fastener inventory your project requires before you begin. By creating a detailed cut list extracted from your blueprint, you can optimize board layouts to minimize offcuts. Additionally, catching design flaws on paper — rather than mid-build — prevents costly rework and eliminates the need to purchase replacement materials.