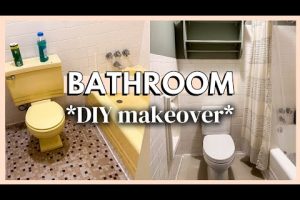
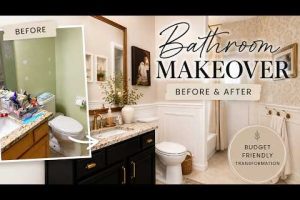
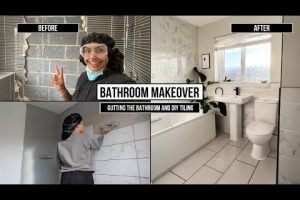
A bathroom tile makeover on a budget is one of the most rewarding home improvement projects you can tackle without draining your savings. Whether you are tired of outdated ceramic floors, stained grout lines, or walls that have seen better days, transforming your bathroom with affordable tiles is entirely achievable. The good news is that you do not need to hire an expensive contractor or spend thousands of dollars to get stunning results. With the right planning, material choices, and a bit of elbow grease, your bathroom can look like a five-star spa for a fraction of the cost. This guide covers everything from budget planning and material selection to installation techniques that deliver professional-looking finishes at a DIY-friendly price point.
Why a Bathroom Tile Makeover on a Budget Is Worth Your Time
Your bathroom is one of the most frequently used rooms in any home, yet it often receives the least attention when it comes to renovation. A tired, outdated tile layout can drag down the entire feel of the space, making even a clean bathroom look dated and unwelcoming. The average homeowner spends between $3,000 and $10,000 on a full bathroom renovation, but a tile-focused transformation can cost as little as $500 to $1,500 depending on the size of the area and the materials you choose. That is an incredible return on investment when you consider how much visual impact fresh tiles bring to the room.
A budget-friendly tile makeover also allows you to increase your home’s resale value without the massive expense of a full remodel. Potential buyers notice updated bathrooms more than almost any other feature, and affordable tile solutions can make your space photograph beautifully for listings or personal enjoyment. Beyond aesthetics, replacing damaged or worn tiles protects your bathroom from moisture damage, mold growth, and structural issues that arise from neglected surfaces.
Planning Your Budget-Friendly Bathroom Tile Makeover
Assessing Your Current Space and Defining Scope
Before you purchase a single tile, walk through your bathroom and evaluate what needs attention. Are the floor tiles cracked and discolored? Is the grout crumbling or discolored? Do the shower walls have outdated patterns that no longer fit your style? Write down every surface you want to cover, measure the square footage of each area, and note whether you plan to replace tiles entirely or refresh what is already there with paint or overlays.
Setting a Realistic Budget
Your budget determines everything from tile material to installation method. Here is a realistic breakdown for a standard bathroom tile makeover on a budget:
- Tiles (materials only): $100 to $400 depending on type and coverage area
- Adhesive, grout, and sealant: $30 to $80
- Tools (if not already owned): $40 to $100
- Accent pieces or trim: $20 to $60
- Total estimated cost: $190 to $640
These numbers assume a DIY approach. If you hire a handyman, add roughly 30 to 50 percent to the labor estimate, but even professional installation on a small bathroom stays well under $2,000.
Choosing the Right Affordable Tile Materials
Material selection is the single most important decision when planning a bathroom tile makeover on a budget. The wrong choice leads to wasted money, while the right material delivers beauty, durability, and water resistance at a low price point.

Ceramic, Porcelain, Vinyl, and Peel-and-Stick: A Comparison

| Tile Type | Average Price per Sq Ft | Durability | Water Resistance | DIY Difficulty |
| Ceramic | $0.50 – $3.00 | Moderate | Good | Easy |
| Porcelain | $1.00 – $5.00 | Very High | Excellent | Moderate |
| Luxury Vinyl Plank (LVP) | $0.80 – $2.50 | High | Excellent | Very Easy |
| Porcelain (Floor-Specific) | $1.50 – $4.00 | Very High | Excellent | Moderate |
| Peel-and-Stick Vinyl | $0.30 – $1.50 | Low to Moderate | Good | Very Easy |
| Glass Subway Tiles | $1.00 – $4.00 | High | Excellent | Moderate |
Best Tile Picks for Tight Budgets
For a bathroom tile makeover on a budget, ceramic and porcelain remain the gold standards. Ceramic tiles are softer and easier to cut, making them ideal for first-time DIYers. Porcelain is denser and more water-resistant, which makes it perfect for shower walls and floors. Luxury vinyl plank tiles have surged in popularity because they mimic the look of natural stone or wood at a fraction of the cost and require zero grout or messy adhesive.
If you are looking for the absolute cheapest option, peel-and-stick vinyl tiles offer instant transformation with no special tools. However, they are less durable and may not last as long in a high-moisture environment. For the best balance of cost and longevity, choose porcelain tiles in the $1 to $3 per square foot range and pair them with a quality waterproof adhesive.
Step-by-Step Guide to Installing Budget Bathroom Tiles
Preparation and Surface Cleaning
Preparation is where most DIY tile projects go wrong. Before you lay any tile, the surface must be clean, dry, and level. Remove all old tiles carefully using a chisel and hammer, being mindful of the subfloor or wall substrate underneath. Sweep up all debris and vacuum the area thoroughly. If the surface is uneven, apply a thin layer of floor-leveling compound and let it dry completely before proceeding.
- Remove all fixtures, hardware, and old tiles from the work area
- Clean the surface with a degreaser or TSP (trisodium phosphate) solution
- Let the surface dry completely (at least 24 hours)
- Apply a primer or waterproof membrane if working in the shower zone
- Dry-lay your tiles on the floor to plan your pattern and spacing
Laying the Tiles Like a Pro
Start tiling from the center of the room or the focal point, working outward toward the edges. This ensures symmetrical cuts and a balanced look. Apply thin-set mortar using a notched trowel, pressing each tile firmly into place with slight twisting motions. Use tile spacers to maintain even grout lines throughout the installation.
For a budget bathroom tile makeover, consider using a simple subway pattern or herringbone layout. These classic designs require fewer custom cuts and look polished even with minor imperfections. After all tiles are set, allow the adhesive to cure for 24 to 48 hours before applying grout. Mix your grout to a peanut butter consistency, spread it diagonally across the tiles with a rubber float, and wipe away excess with a damp sponge.
Creative Design Ideas That Save Money
You do not need expensive materials to create a high-end look. Here are proven strategies for a stunning bathroom tile makeover on a budget:
- Accent walls: Use affordable tiles on one focal wall and paint the remaining three walls in a complementary color for a dramatic effect at a fraction of the cost
- Mix and match: Combine basic white subway tiles with a few decorative patterned tiles in the shower area or behind the vanity to create visual interest without overspending
- Grout color choice: Use a grout color that closely matches your tile to create a seamless, modern look that hides minor imperfections
- Repurpose and refresh: If your tile is structurally sound but visually outdated, consider painting tiles with specialized tile paint or applying adhesive tile decals as a temporary budget-friendly refresh
- Focus on the shower: Redoing only the shower walls instead of the entire bathroom can cut costs by 40 to 60 percent while still delivering a transformative result
Common Mistakes to Avoid During a Budget Tile Makeover
Even the best-planned projects run into trouble when common pitfalls go unchecked. One of the biggest mistakes is skipping waterproofing in wet areas. Always use a waterproof membrane or waterproof thin-set mortar behind tiles in the shower zone, behind sinks, and in any area prone to standing water. Another mistake is choosing tiles that are too small for a large floor space, which creates excessive grout lines and a cluttered appearance. Conversely, oversized tiles in a small bathroom can make the space feel cramped.
Do not underestimate the cost of tools and accessories. A quality notched trowel, level, spacers, and a good grout float are essential purchases that protect your investment. Cutting corners on adhesive quality is another frequent error — cheap mortar fails in humid environments, leading to loose tiles and costly repairs down the road.
Frequently Asked Questions
What is the cheapest way to do a bathroom tile makeover?
The cheapest approach is to use peel-and-stick vinyl tiles for walls or floors, which cost as little as $0.30 per square foot and require no mortar or grout. For a more permanent solution, basic ceramic subway tiles paired with budget-friendly thin-set mortar offer the best value, typically costing between $190 and $400 total for a standard bathroom.
Can I tile over existing tiles without removing them?
Yes, you can tile over existing tiles if the current surface is intact, flat, and clean. Lightly sand the existing tiles for adhesion, apply a primer, and use a thin-set mortar rated for tile-over-tile installations. However, this method adds a small height increase to the floor, which may affect door clearances and transition strips.
How long does a DIY bathroom tile makeover take?
A full bathroom tile makeover on a budget typically takes two to four weekends for a competent DIYer. The process involves demolition (one day), surface preparation (one day), tile installation (two to three days), grout application (one day), and curing time (24 to 48 hours before use).
What type of tile is best for a wet bathroom floor?
Porcelain tiles are the best choice for wet bathroom floors because they are naturally water-resistant, extremely durable, and have a low water absorption rate of less than 0.5 percent. Choose porcelain tiles rated for wet areas and pair them with a waterproof thin-set mortar for the longest-lasting results.
How do I make cheap tiles look expensive?
The secret to making affordable tiles look expensive lies in three factors: grout color selection, consistent spacing, and proper lighting. Choose a grout color that closely matches the tile tone for a seamless modern look. Use precise spacers and a level to ensure perfectly aligned tiles. Add recessed LED lighting or updated fixtures to elevate the entire room’s appearance.
Final Thoughts on Your Bathroom Tile Makeover
A bathroom tile makeover on a budget proves that transformative home improvement does not require a massive financial commitment. By choosing the right materials, planning your layout carefully, and following proven installation techniques, you can completely reinvent your bathroom’s look and feel for under $1,000 in most cases. The key is to invest smartly in durable, water-resistant materials and spend time on preparation and execution rather than splurging on premium brands that offer diminishing returns in residential bathrooms.
Start with a clear plan, stick to your budget, and do not be afraid to tackle the project yourself. Every tile you place brings you closer to the bathroom of your dreams. Share your results, learn from the process, and enjoy the satisfaction of knowing you transformed a core space in your home without breaking the bank. Your budget bathroom tile makeover is not just an update — it is an investment in your home’s comfort, functionality, and long-term value.