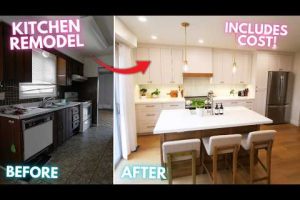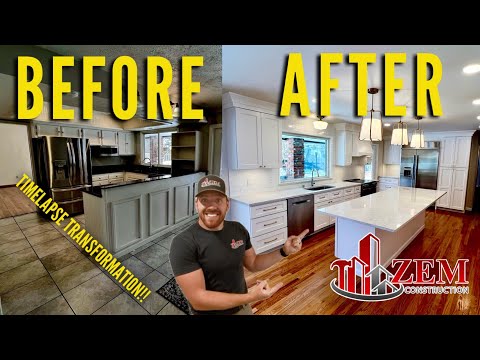
A DIY kitchen renovation can completely transform the heart of your home without the massive price tag that comes with hiring a professional contractor. Whether you are a seasoned weekend warrior or a homeowner taking on your first major home improvement project, tackling your kitchen remodel yourself gives you full creative control, significant cost savings, and a profound sense of accomplishment. In this comprehensive guide, we walk you through every phase of a DIY kitchen makeover, from initial planning and budgeting to installation, finishing touches, and common pitfalls that can derail even the most determined renovator. If you have been searching for practical steps to renovate your kitchen on your own terms, this article covers everything you need to know.
Why DIY Kitchen Renovation Is Worth the Effort
Kitchen renovations consistently rank among the most expensive home improvement projects, with professional installation often accounting for 30 to 50 percent of the total budget. By choosing a DIY approach, you redirect that labor cost directly into better materials, upgraded fixtures, and design features that truly reflect your personal style. Beyond financial benefits, a self-directed remodel allows you to work at your own pace, make real-time design decisions, and develop skills that increase your home’s long-term value. Homeowners who complete their own kitchen updates frequently report higher satisfaction because every choice — from cabinet hardware to backsplash tile selection — is a personal decision rather than a compromise made to fit a contractor’s schedule.
Cost Savings Breakdown

The average professional kitchen renovation costs between $15,000 and $45,000 depending on scope, location, and material quality. A well-planned DIY project can reduce that figure by 40 to 60 percent. Your largest savings typically come from eliminating contractor labor rates, which range from $50 to $100 per hour for skilled tradespeople. However, it is essential to factor in tool purchases, potential material waste, and the time investment required to complete each phase of the work.
Planning Your Kitchen Remodel Like a Pro
Successful kitchen transformation starts long before you pick up a hammer or open a box of tiles. The planning phase determines whether your project runs smoothly or spirals into costly mistakes. Start by assessing your current kitchen layout and identifying what is not working. Do you need more counter space? Better storage solutions? A more open flow between the kitchen and dining area? Answering these questions honestly will guide every decision that follows.
Mapping Out Your Layout
The kitchen work triangle — the relationship between the sink, stove, and refrigerator — remains a foundational principle of functional kitchen design. When planning your remodel, ensure that each leg of the triangle measures between four and nine feet for optimal efficiency. Consider the following layout options:
- Galley kitchen: Ideal for narrow spaces, offering two parallel countertops and efficient workflow.
- L-shaped kitchen: Maximizes corner space and provides natural separation between cooking and prep zones.
- U-shaped kitchen: Delivers maximum countertop and cabinet space, perfect for larger rooms.
- Open concept: Removes walls to connect the kitchen with living or dining areas, requiring structural planning.

Budgeting for a DIY Kitchen Project
Creating a realistic budget is one of the most critical steps in any DIY kitchen renovation. Without a clear financial plan, expenses can quickly spiral out of control. A well-structured budget accounts for materials, tools, permits, and a contingency fund for unexpected challenges.
| Budget Category | Estimated Cost Range | Priority Level |
| Cabinets and hardware | $2,000 – $8,000 | High |
| Countertops | $1,000 – $5,000 | High |
| Flooring | $800 – $3,000 | Medium |
| Backsplash and tile | $500 – $2,500 | Medium |
| Plumbing fixtures | $300 – $1,500 | High |
| Lighting upgrades | $200 – $1,200 | Medium |
| Painting and finishing | $200 – $800 | Low |
| Contingency fund (10-15%) | $500 – $3,000 | Essential |
When comparing budget estimates, always add a 10 to 15 percent contingency buffer. Structural surprises, such as water damage behind old cabinets or outdated electrical wiring, are common in older homes and can add significant unplanned costs. Setting aside this reserve fund prevents you from compromising on material quality when surprises arise.
Essential Tools and Materials You Will Need
Before demolition day arrives, assemble every tool and material you will need for the entire project. Running to the hardware store mid-renovation wastes valuable time and disrupts your workflow momentum. Here is a comprehensive checklist to keep you organized:
- Demolition tools: Crowbar, pry bar, utility knife, hammer, and a reciprocating saw for cutting through stubborn materials.
- Measuring and layout tools: Tape measure, level, laser measure, and carpenter’s square for precision cuts and alignments.
- Power tools: Drill/driver, circular saw, jigsaw, orbital sander, and a tile cutter for backsplash installation.
- Plumbing supplies: Pipe wrench, plumber’s tape, pipe cutters, and replacement connectors for sink and faucet work.
- Fasteners and adhesives: Construction screws, wood glue, construction adhesive, and grout for securing and finishing surfaces.
- Safety equipment: Safety glasses, work gloves, dust mask, knee pads, and ear protection for power tool use.
Step-by-Step Kitchen Renovation Process
Executing a DIY kitchen makeover requires a logical sequence of tasks. Skipping steps or working out of order leads to costly rework and frustration. Follow this structured approach for the best results.
Step 1: Demolition
Begin by removing old cabinets, countertops, appliances, and flooring. Protect your floors with drop cloths and turn off the electricity and water supply to the kitchen before any tear-out work. Dispose of debris responsibly by renting a dumpster or coordinating with your local waste management facility. Document the locations of plumbing and electrical lines before closing up walls.
Step 2: Structural and Rough-In Work
If your plan involves removing or adding walls, installing new electrical outlets, or relocating plumbing lines, this is the phase to handle it. For electrical work, always pull the necessary permits and have inspections scheduled. Repositioning a sink drain or adding a new GFCI outlet requires knowledge of local building codes and proper wiring techniques.
Step 3: Installation of Core Elements
Install new cabinets first, working from the top down to ensure level alignment. Secure them to wall studs using a drill and appropriate screws. Next, measure and cut countertops to fit precisely around cabinets and appliances. For laminate or solid surface materials, a circular saw with a fine-tooth blade delivers clean edges. After countertops are set, install your backsplash tiles using thinset mortar and allow adequate curing time before grouting.
Step 4: Flooring and Final Finishing
Lay flooring before installing the final appliances so that you can work around fixed fixtures. Vinyl plank, ceramic tile, and engineered hardwood are popular choices for kitchen renovations due to their durability and ease of DIY installation. Finish by painting walls, installing lighting fixtures, and connecting all appliances to their respective utility lines.

Common DIY Kitchen Mistakes to Avoid
Even the most enthusiastic homeowner can fall into traps that compromise the quality and safety of their renovation. Watch out for these frequent errors:
- Underestimating project complexity: Tasks like relocating plumbing or modifying load-bearing walls require permits and professional knowledge. Know your limits and hire a licensed tradesperson when safety is at stake.
- Skipping permits: Unpermitted work can result in fines, failed inspections during resale, and even mandatory reversal of completed work.
- Measuring inaccurately: A half-inch error on a countertop cutout can ruin an expensive slab. Always double and triple-check every measurement before making a permanent cut.
- Ignoring ventilation: A proper range hood is not just a luxury; it is a functional necessity that protects your kitchen from grease buildup, moisture damage, and indoor air pollution.
- Choosing style over function: Beautiful open shelving may look stunning in photos but could create practical storage challenges for everyday kitchen use.
Conclusion
A DIY kitchen renovation is one of the most rewarding home improvement endeavors a homeowner can undertake. With thorough planning, a realistic budget, the right tools, and a structured approach to execution, you can achieve a stunning kitchen transformation that rivals professional results. The key is to balance ambition with practicality — knowing when to tackle a task yourself and when to bring in expert help for specialized work. Start with a clear vision, follow each step methodically, and remember that the best renovation is one that reflects how you actually live and cook in your kitchen every single day.
FAQs: DIY Kitchen Renovation
How long does a DIY kitchen renovation typically take? A moderately complex DIY kitchen remodel generally takes four to eight weeks to complete, depending on the scope of work, your skill level, and the time you can dedicate each week. Simpler refreshes involving paint, hardware swaps, and backsplash updates can be finished in one to two weekends, while full gut renovations involving plumbing relocation, electrical upgrades, and new cabinet installation require significantly more time.
Do I need a permit for a DIY kitchen renovation? Permit requirements vary by municipality and depend on the scope of your project. Cosmetic changes such as painting, replacing cabinet hardware, and installing a new backsplash typically do not require permits. However, any work involving structural modifications, electrical rewiring, plumbing relocation, or wall removal almost always requires a permit and a scheduled inspection from your local building authority.
What is the most expensive part of a DIY kitchen renovation? Cabinets and countertops are typically the two most expensive line items in any kitchen renovation budget. Custom or semi-custom cabinetry can consume a large portion of your total spend, while quartz or granite countertops carry significant material and cutting costs. If budget is a primary concern, consider refacing existing cabinets instead of full replacement and explore budget-friendly countertop alternatives like butcher block or tiled surfaces.
Can a beginner successfully complete a DIY kitchen renovation? Yes, beginners can successfully manage a kitchen renovation by focusing on cosmetic updates such as cabinet painting, fixture upgrades, and backsplash installation before attempting more complex tasks. Start with smaller projects to build confidence and skills, then progressively tackle larger scope items like countertop replacement or appliance installation as your experience grows.
How do I choose the right kitchen renovation layout for my space? Select your kitchen layout based on available square footage, traffic flow patterns, and your primary cooking habits. Small kitchens benefit from galley or L-shaped configurations that maximize storage and workflow efficiency. Larger open-concept kitchens can accommodate island layouts that add prep space, storage, and a natural gathering point for family and guests.