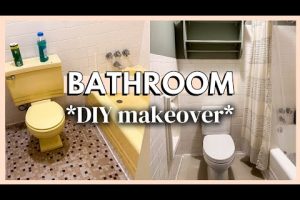
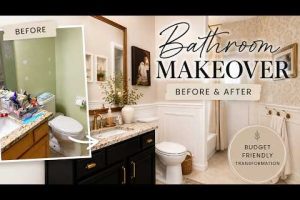
A bathroom vanity makeover on a budget is one of the most rewarding ways to breathe new life into your home without breaking the bank. Whether you are tired of dated cabinetry, chipped surfaces, or an outdated aesthetic that makes the whole room feel tired, transforming your vanity does not require a massive renovation or a hefty price tag. With the right approach to an affordable bathroom vanity refresh, you can achieve stunning results that rival high-end designs. This comprehensive guide will walk you through every step, from initial planning to the final finishing touches, ensuring your space looks incredible while keeping your wallet happy. A well-executed budget bathroom vanity transformation does not just save you money; it gives you complete creative control over the final product and the satisfaction of a job done exceptionally well.
Why a Bathroom Vanity Makeover on a Budget is Worth Your Time
Renovating a bathroom can quickly become expensive, but focusing on the vanity—a room’s visual centerpiece—offers the highest visual return on your investment. A budget bathroom vanity transformation allows you to customize your space exactly as you envision it, rather than settling for standard off-the-shelf options that might not fit your personal style. When you undertake a DIY bathroom vanity update, you control the quality of materials, the color palette, and the overall craftsmanship. Furthermore, updating bathroom vanities on a budget significantly increases your home’s resale value. Potential buyers notice well-maintained, stylish bathrooms, and a freshly updated vanity signals that the home has been cared for meticulously. You do not need to replace the entire cabinet structure to make a massive impact; sometimes, a simple cosmetic refresh is all it takes to turn a forgettable space into a stunning retreat.
Planning Your Affordable Bathroom Vanity Refresh
Assessing Your Current Setup
Before buying any supplies, take a close look at your existing vanity. Is the structural integrity solid, or is it riddled with water damage and rot? If the cabinet boxes are in good shape, you can focus purely on cosmetic upgrades that will elevate the entire room. However, if the drawers stick, the doors do not close properly, or there is visible moisture damage, you must address these issues first. Tightening screws, adjusting hinges, and replacing damaged drawer slides are essential preliminary steps for a successful cheap bathroom vanity transformation. Remove all hardware, clean the surfaces thoroughly with a degreaser to remove soap scum and grime, and identify any cracks or chips that need filling. For vanity bases made of MDF or plywood, ensure the edges are sealed properly so they do not absorb moisture during your project. Taking the time to assess and prep properly is the foundation of any successful affordable bathroom vanity refresh.
Setting a Realistic Budget
Knowing exactly how much you can spend is crucial for a successful affordable bathroom vanity refresh. Break your budget down into three distinct categories: paint and preparation supplies, new hardware, and sink or countertop upgrades. A tight budget might focus primarily on paint and hardware, while a slightly larger one could accommodate a modern vessel sink or a stylish faucet. Always purchase slightly more paint than you think you need, and invest heavily in a high-quality primer—this is the secret to a durable finish that lasts for years without chipping or peeling. Additionally, set aside a small contingency fund for unexpected issues, like discovering hidden water damage once you start removing the doors.

Step-by-Step DIY Bathroom Vanity Update
Following a clear, logical sequence ensures your DIY bathroom vanity update goes smoothly and yields professional-grade results. Here is the proven process that experts use to achieve a flawless finish on a budget, ensuring every detail is handled correctly:
- Strip and Clean: Remove all doors, drawers, and hardware completely. Clean the surfaces with a heavy-duty degreaser to remove years of built-up soap scum, dust, and grime. This step is vital for paint adhesion, as any residual grease will cause the paint to peel prematurely.
- Repair and Sand: Fill any dents, holes, or cracks with a quality wood filler. Once dry, sand the entire surface thoroughly with 120-grit sandpaper. This creates a slightly rough texture, or “tooth,” that allows the primer to grip the surface securely, preventing future flaking.
- Prime Thoroughly: Apply a high-quality bonding primer. This step is absolutely non-negotiable, especially if you are painting over laminate, glossy finishes, or existing synthetic surfaces. The primer bridges the gap between the old surface and your new paint, creating a stable foundation.
- Paint Strategically: Use a durable satin or semi-gloss enamel paint, which resists moisture and scrubbing. Apply thin, even coats using a high-quality microfiber roller for flat surfaces and a premium angled brush for edges and details. Allow proper drying time between each layer to avoid drips.
- Reassemble and Upgrade Hardware: Once everything is completely dry, reattach the doors and drawers. Install your new hardware. Swapping out old pulls and knobs instantly elevates the entire look, serving as the perfect finishing touch for your affordable bathroom vanity refresh.
Comparing Budget Vanity Upgrade Methods
When considering updating bathroom vanities on a budget, you have several distinct paths to choose from. Each method offers a different balance of cost, effort, and visual impact. Below is a detailed comparison of the most popular approaches for a bathroom vanity makeover on a budget.
| Method | Cost Range | Difficulty Level | Best For |
| Painting and New Hardware | $50 – $150 | Beginner | Solid wood or MDF cabinets with minor surface wear |
| Veneer or Laminate Refacing | $100 – $300 | Intermediate | Badly damaged or outdated woodgrain surfaces that cannot be painted easily |
| Replacing Sink and Faucet | $100 – $250 | Beginner | Structurally sound cabinets needing a modern aesthetic boost |
| Full Cabinet Reface with New Doors | $200 – $500 | Advanced | Solid bases needing a complete visual overhaul without replacing boxes |

Expert Tips for a High-End Look on a Low Budget
A cheap bathroom vanity transformation should never look cheap. To achieve that high-end, designer feel without the designer price tag, follow these expert tips for your affordable bathroom vanity refresh. First, always invest in quality hardware. Swapping out flimsy plastic pulls for brushed nickel, polished chrome, or matte black knobs makes a massive visual difference and hides the budget-friendly nature of the project. Second, pay close attention to the edges. Use painter’s tape meticulously to create crisp, sharp lines where the vanity meets the wall or the countertop. Third, consider upgrading the sink. A modern vessel sink or a vessel sink with a matte finish completely transforms the countertop area, making the entire bathroom appear updated and luxurious. Finally, use caulk wisely. A fresh, even bead of caulk around the edges of your vanity and countertop hides imperfections, prevents water intrusion, and gives a finished, professional look that screams expensive.
Frequently Asked Questions
How can I update my bathroom vanity on a budget without replacing it?
The most cost-effective method is focusing on cosmetic updates like painting the cabinet and replacing the hardware. A fresh coat of high-quality primer and durable enamel paint, combined with stylish new knobs and pulls, completely transforms updating bathroom vanities on a budget. You can also refinish the countertop or add a peel-and-stick backsplash for a minimal investment that changes the room’s vibe.
What is the cheapest way to redo a bathroom vanity?
The absolute cheapest method is a thorough cleaning followed by a careful painting job. If your vanity is structurally sound, you can often achieve a cheap bathroom vanity transformation for under $100. Purchase bonding primer, enamel paint, sandpaper, and new hardware from a discount store. This approach requires the most labor but yields the highest savings, making it the ultimate choice for a budget bathroom vanity makeover.
Can I paint a bathroom vanity instead of replacing it?
Absolutely. Painting is the cornerstone of a successful DIY bathroom vanity update. However, you must use the right technique because bathrooms are high-moisture environments. You cannot use standard wall paint. You need bonding primer and durable, moisture-resistant enamel paint. Properly prepping the surface by sanding and priming ensures the paint adheres strongly and survives the humid conditions of a daily-use bathroom.
How do I make a cheap bathroom vanity transformation look expensive?
The secret to making a budget bathroom vanity makeover look expensive lies in the details and the finish. Choose hardware with a premium finish like brushed brass or matte black. Ensure paint edges are perfectly taped off, and caulk gaps seamlessly. Additionally, adding a stylish vessel sink or updating the faucet elevates the entire piece, making it appear as though you spent thousands, even though you spent a fraction on your affordable bathroom vanity refresh.
What materials are best for a budget bathroom vanity upgrade?
For a bathroom vanity makeover on a budget, MDF and solid wood are best for painting, as they take primer and enamel beautifully. For the countertop, if you cannot afford natural stone, consider high-quality laminate or peel-and-stick marble contact paper. These materials provide the visual impact of quartz at a fraction of the cost of a full bathroom vanity transformation, giving you the luxury look you crave.
How long does a DIY bathroom vanity makeover take?
A budget bathroom vanity transformation typically takes two to three days, depending on your skill level and drying times. The first day is for prep, cleaning, and priming. The second day is for painting and applying a second coat. The final day is for reassembling the hardware and re-installing the vanity. Rushing the drying process will ruin the finish and ruin your hard work, so patience is absolutely key to a successful and stunning affordable bathroom vanity refresh.
Conclusion
A bathroom vanity makeover on a budget is more than just a home improvement project; it is a statement of personal style, resourcefulness, and creativity. By following the detailed steps outlined above, you can transform your outdated bathroom into a serene, stylish retreat without the financial stress of a full remodel. From choosing the right paint and primer to selecting the perfect hardware and upgrading the sink, every detail matters in your affordable bathroom vanity refresh. Roll up your sleeves, gather your supplies, and get ready to enjoy a stunning vanity that proves you do not need a massive budget to achieve professional, breathtaking results. Start your budget bathroom vanity transformation today, and let your creativity shine!