


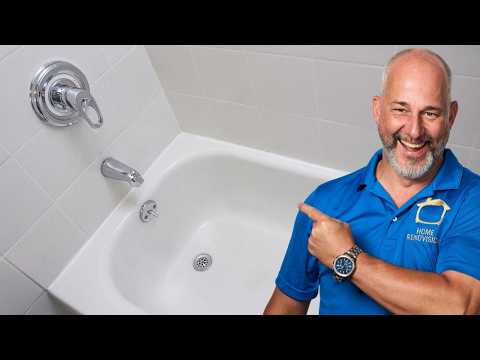
Bathroom shower renovation is one of the most impactful home improvement projects you can tackle. Whether you are upgrading a cramped, outdated stall or transforming your entire bathroom into a spa-like retreat, the right renovation can dramatically improve functionality, aesthetic appeal, and even your home’s resale value. But where do you actually begin? This guide walks you through every phase of a shower renovation — from initial planning and material selection to installation tips and long-term maintenance — so you can make confident decisions and avoid costly mistakes.

Why a Shower Renovation Delivers Outstanding Returns
Homeowners often underestimate the value a refreshed shower space brings. Beyond aesthetics, a well-executed bath shower renovation addresses everyday frustrations like poor water pressure, leaks, inadequate storage, and difficult-to-clean surfaces. A modern, thoughtfully designed shower enhances the entire bathroom experience and signals to potential buyers that the property has been well-maintained. According to industry data, mid-range bathroom remodels typically recover 60 to 70 percent of their cost at resale, with shower upgrades being a major draw for prospective buyers.
The return on investment becomes even more compelling when you focus on water efficiency and durability. Replacing old fixtures with low-flow showerheads, waterproof membranes, and mold-resistant materials means lower utility bills and fewer repair calls over time.
Planning Your Shower Renovation from Start to Finish
Assessing Your Current Setup
Before you purchase a single tile or fixture, spend time evaluating what you currently have. Walk through your bathroom and note the following:
- The age and condition of the shower pan, faucet, and drain
- Whether the existing waterproofing is intact or showing signs of failure
- Available space and how it limits or enables design options
- Plumbing accessibility and whether rerouting lines is necessary
- Ventilation quality and moisture management
This honest assessment forms the foundation of every decision that follows. Skipping it is the single most common reason renovation budgets spiral out of control.
Setting a Realistic Budget
A shower renovation budget can range anywhere from a few hundred dollars for a simple fixture swap to $10,000 or more for a full walk-in redesign. Here is a rough breakdown to help you allocate funds wisely:
| Component | Budget Range (USD) |
| Basic fixture replacement (head, handle, trim) | $200 – $800 |
| Partial retiling and regrouting | $800 – $2,500 |
| Waterproofing membrane and new pan | $1,000 – $3,500 |
| Full walk-in shower conversion | $4,000 – $12,000 |
| Smart shower system with thermostatic valve | $1,500 – $5,000 |
Always set aside a contingency fund of at least 15 to 20 percent above your projected cost. Hidden issues — rotted subfloor, outdated plumbing, or mold behind tile — are common discoveries during renovation and can add unexpected expenses.
Choosing a Style and Layout
Your shower renovation style should complement the overall bathroom design while serving your daily routine. Popular approaches include:
- Neutral Minimalist — Clean lines, large-format tiles, frameless glass enclosures, and a single rainfall showerhead.
- Spa Retreat — Multiple body jets, a built-in bench, natural stone surfaces, and ambient lighting.
- Modern Industrial — Concrete-look panels, matte black hardware, and geometric tile patterns.
- Classic Traditional — Subway tile, chrome fixtures, a glass door with a chrome frame, and a classic tub-shower combo.

Each style carries different price points and installation complexities, so align your choice with both your taste and your budget.
Materials and Fixtures for a Modern Shower Renovation
Selecting the right materials is where the durability and visual impact of your renovation are truly decided. Here is a detailed look at your primary options:
| Material | Durability | Maintenance | Cost per Sq. Ft. |
| Porcelain Tile | Excellent — low absorption, scratch-resistant | Low — easy to clean, grout sealing needed | $3 – $12 |
| Natural Stone (Marble, Granite) | Very High — naturally strong | Medium — requires sealing, sensitive to acids | $10 – $35 |
| Glass Tile | Good — waterproof, non-porous | Low — smooth surface resists grime | $7 – $25 |
| Solid Surface (Quartz-based) | Excellent — seamless, no grout lines | Very Low — wipes clean easily | $40 – $80 |
| Acrylic Shower Pan | Good — lightweight, pre-molded | Low — prone to scratching over time | $300 – $800 (unit) |
When it comes to showerheads and faucets, consider thermostatic valves that maintain consistent water temperature, even when other fixtures are in use. Low-flow options rated at 1.8 gallons per minute or less deliver excellent pressure while conserving water — a win for both your utility bill and the environment.
Step-by-Step Shower Renovation Process
Step 1: Demolition and Prep
Remove existing tile, fixtures, and the shower pan carefully to avoid damaging the subfloor or plumbing lines. Protect adjacent areas with plastic sheeting and drop cloths. Inspect the wall framing and subfloor for moisture damage or rot, replacing any compromised materials before proceeding.
Step 2: Plumbing and Waterproofing
Reconfigure plumbing if your new layout demands it. Install a waterproof membrane — either a liquid-applied system or a sheet membrane — on all walls and the floor. This is the most critical step; inadequate waterproofing is the leading cause of shower leaks and structural damage.
Step 3: Drain and Pan Installation
Set the drain at the correct height and slope (typically 1/4 inch per foot). Install the shower pan or build a mortar bed, ensuring proper grading toward the drain to prevent standing water.
Step 4: Tiling and Grouting
Begin tiling from the floor upward, using spacers for consistent grout lines. Allow tile adhesive to cure fully before applying grout. Seal grout lines with a quality sealer after 72 hours to prevent moisture penetration and staining.
Step 5: Fixture and Enclosure Installation
Mount the showerhead, handles, and any body jets. Install the glass enclosure or curtain rod, checking for level and proper sealing. Finally, caulk all transition points where the shower meets the rest of the bathroom to prevent water intrusion.
Common Shower Renovation Mistakes to Avoid
- Skipping waterproofing — Even the most beautiful tile looks terrible when water seeps behind it and causes mold or rot.
- Ignoring ventilation — Without proper exhaust fans or a window, moisture accumulates and shortens the life of every material in the shower.
- Underestimating the timeline — A typical shower renovation takes 5 to 10 working days, including drying and curing times. Rushing leads to sloppy results.
- Choosing the wrong tile size for the space — Large-format tiles in a small shower create awkward cuts, while tiny mosaic tiles can make the space feel cluttered.
- Hiring the cheapest contractor — Plumbing and waterproofing work demand skilled professionals. Cutting corners here almost always means expensive callbacks.
Expert Tips for a Flawless Renovation
Experienced contractors and designers agree on a few principles that separate average renovations from exceptional ones. First, always photograph your existing plumbing and wiring before you start demolition — this creates a valuable reference if issues arise later. Second, order 10 to 15 percent extra tile to account for cuts, breakage, and future repairs. Third, invest in a quality shower door with a low-E or anti-fog coating; it transforms the daily experience and keeps glass looking crystal clear for years.
Finally, do not underestimate the power of lighting. Recessed LED strips inside the shower niche, paired with a dimmable overhead fixture, create an atmosphere that elevates a simple bathroom into a personal retreat.
Frequently Asked Questions
How long does a typical bath shower renovation take?
A standard shower renovation usually takes between 5 and 10 working days, depending on the scope of the project. Simple fixture replacements and regrouting may be completed in 2 to 3 days, while a full walk-in conversion involving new plumbing, waterproofing, tiling, and enclosure installation typically requires a full week or longer, including drying and curing time for adhesives and grout.
What is the average cost of a shower renovation?
The average cost ranges from $2,000 for a basic update to $10,000 or more for a luxury walk-in shower. Most homeowners spend between $4,000 and $6,500 on a mid-range renovation that includes new fixtures, tile, waterproofing, and a glass enclosure. Your exact cost will depend on materials chosen, bathroom size, and whether any plumbing or structural work is required.
Do I need a permit for a shower renovation?
In most jurisdictions, a shower renovation that involves moving plumbing lines, altering the drainage system, or changing the structural layout requires a building permit. Simple cosmetic updates like retiling or replacing fixtures usually do not. Always check with your local building authority before starting work to avoid fines or complications when selling your home.
What is the best waterproofing method for a shower renovation?
Liquid-applied waterproofing membranes are widely regarded as the most reliable option for shower renovations. They create a seamless, flexible barrier that conforms to corners, curves, and pipe penetrations. Sheet membranes are another strong choice, especially for floors with uneven subfloors. Regardless of the method, ensure that walls are waterproofed to at least 6 feet above the shower floor and the floor extends beyond the shower pan perimeter.
Can I renovate my shower without removing all the tile?
Yes, in some cases you can install new tile directly over existing tile if the old surface is structurally sound, firmly adhered, and properly cleaned for bonding. However, this approach adds thickness to the shower floor, which can complicate drain height and slope. It is generally recommended to remove old tile and inspect the substrate for moisture damage before installing a new waterproofing layer — this ensures a longer-lasting, leak-free result.
Conclusion
A bath shower renovation is far more than a cosmetic update — it is a strategic investment in your home’s comfort, functionality, and long-term value. By planning carefully, selecting high-quality materials, and following proven installation practices, you can create a shower space that looks stunning and performs flawlessly for decades. Whether you are tackling a weekend refresh or a full-scale transformation, the key is to balance ambition with practical budgeting and realistic timelines. Start with a clear vision, work with trusted professionals, and enjoy the process of building a shower that truly feels like your own private oasis.