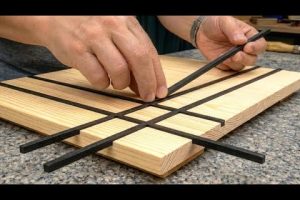
There is something deeply satisfying about picking up a set of DIY carpentry plans and watching a raw piece of lumber transform into something functional and beautiful. Whether you are building a rustic garden shed, crafting custom shelving for your living room, or assembling a sturdy workbench for your garage, having a reliable set of woodworking project plans is the single biggest factor between a frustrating half-finished project and a finished piece you are proud to display. In this comprehensive guide, we will walk you through everything you need to know about finding, selecting, and executing the best home carpentry guides available today, regardless of whether you are just picking up a hammer for the first time or you are a seasoned weekend woodworker looking to refine your craft.
What Are DIY Carpentry Plans and Why They Matter
At their core, DIY carpentry plans are detailed blueprints or instructional documents that outline every step needed to build a specific wooden structure or furniture piece. These plans typically include materials lists, cut diagrams, measurements, joinery instructions, and assembly sequences. Think of them as a roadmap that eliminates guesswork and keeps your project on track from start to finish. The best carpentry plans do not just tell you what to cut; they explain why each step matters, which is exactly what separates a successful build from a costly mistake.
For beginners, detailed plans provide confidence and structure. For intermediate and advanced woodworkers, they serve as a springboard for customization and creative experimentation. Regardless of your skill level, investing time in finding high-quality woodworking project plans saves money, reduces material waste, and dramatically shortens build time.
Types of DIY Carpentry Plans for Every Skill Level
Beginner-Friendly Woodworking Projects
If you are new to woodworking, the last thing you want is a plan that assumes prior knowledge. The best beginner carpentry plans focus on simple joinery techniques, minimal tooling requirements, and forgiving designs that allow for small measurement errors. Projects like a basic bookshelf, a floating wall shelf, a simple bench, or a picture frame are ideal starting points. These builds teach fundamental skills such as measuring accurately, using a miter saw safely, drilling pilot holes, and applying a finish evenly.
Key characteristics of excellent beginner plans include:
- Clear, annotated diagrams with dimensions on every cut
- A complete materials and hardware list with specific product recommendations
- Step-by-step assembly instructions written in plain language
- Tips for common mistakes and how to avoid them
- Estimated completion time and budget range
Intermediate Carpentry Blueprints
Once you have completed a few beginner builds, intermediate plans introduce more complex techniques like dado joints, rabbets, mortise-and-tenon connections, and curved cuts. Projects at this level might include a storage chest with dovetail joints, a kitchen island with integrated power outlets, or a custom deck railing system. These home carpentry guides demand a bit more precision and often require a broader tool collection, including a router, a pocket-hole jig, or a table saw.
Advanced Custom Wood Build Designs
Advanced DIY carpentry plans are designed for woodworkers who want to push their boundaries. Think intricate furniture pieces like a rocking chair with sculpted spindles, a built-in home office with custom cabinetry, or a timber-frame gazebo. These plans assume mastery of reading detailed blueprints, selecting premium lumber, and executing precision joinery without relying on pocket-hole screws or simple butt joints. They often include 3D renderings, cut-list optimization strategies, and finishing techniques that elevate the final product to a professional standard.
Essential Tools and Materials for Following Carpentry Plans
Before you dive into any project from your chosen DIY carpentry plans, make sure you have the right tools assembled. Having the correct equipment not only makes the build smoother but also ensures safety and accuracy.
Core hand tools every woodworker needs:
- Tape measure and combination square
- Chisel set in various sizes
- Hand plane for smoothing and dimensioning
- Clamps of various sizes for assembly
- Marking gauge and carpenter’s pencil
- Hammer and nail set
Power tools that significantly speed up builds:

- Circular saw or table saw for straight crosscuts and rips
- Drill/driver with a quality set of bits
- Orbital sander for surface preparation
- Router for edges, dadoes, and decorative profiles
- Compound miter saw for angled cuts
When it comes to materials, always read your plan’s lumber specifications carefully. Most plans will recommend a specific wood species and grade—common choices include pine for budget builds, oak for durability, cedar for outdoor projects, and maple or walnut for fine furniture. Purchasing wood that is slightly oversized and milling it to final dimensions in your shop is a time-tested strategy that professional carpenters swear by.
How to Read and Follow Carpentry Plans Effectively
Reading a set of woodworking project plans is a skill in itself. Even experienced builders occasionally misinterpret a diagram or overlook a note in the fine print. Here is a systematic approach to ensure you extract maximum value from every plan you purchase or download.
Step 1: Review the entire plan before cutting any wood. Read through every page, every note, and every warning. Understand the overall sequence of operations and identify which steps depend on others being completed first.
Step 2: Verify your lumber dimensions. Nominal lumber sizes in the United States are not the same as actual dimensions. A 2×4 is actually 1.5 inches by 3.5 inches. Plans that do not account for this will produce pieces that do not fit together correctly.
Step 3: Create a cut list and label every piece. Before making a single cut, transfer all measurements onto the lumber and assign each piece a label or number that matches the plan’s diagram. This prevents costly mix-ups and wasted material.
Step 4: Dry-fit before applying glue or screws. Assembling components without fasteners first allows you to check for proper alignment, identify any discrepancies, and make adjustments before committing permanently.
Where to Find Free and Premium DIY Carpentry Plans

The internet is overflowing with free carpentry blueprints, but not all of them are created equal. Some are meticulously drafted by professional woodworkers, while others are poorly scanned hand-drawn sketches that leave out critical information. Here are the most reliable sources for finding quality plans at every price point:
- Woodworking magazines such as Fine Woodworking, Popular Woodworking, and Wood Magazine consistently publish detailed, tested plans with full-size templates.
- Online plan libraries like Ana White, Woodsmith, and ShopNotes offer both free and premium plans with community feedback and build-along videos.
- YouTube woodworking channels provide visual walkthroughs that complement written plans, making complex assemblies much easier to follow.
- Specialized plan sellers on platforms like Etsy or Woodworking Master Plans offer niche projects—period furniture, tiny homes, or custom cabinetry—that are hard to find elsewhere.
Free vs Premium Carpentry Plans: A Side-by-Side Comparison
| Feature | Free Plans | Paid Plans |
| Cost | No upfront expense | Typically $5 to $40 per plan |
| Detail Level | Varies widely; often incomplete | Usually comprehensive with full cut lists |
| Diagram Quality | Sometimes scanned or low resolution | Professional CAD drawings and 3D views |
| Material Specifications | Often generic | Specific brand and grade recommendations |
| Support and Updates | Rarely included | Often includes email support or member forums |
| Project Variety | Limited to popular, common builds | Wide range including custom and niche projects |
| Best For | Casual builders and first-time DIYers | Serious woodworkers and professional contractors |
Expert Tips for Getting the Most Out of Your DIY Carpentry Plans
Even the best plans will not save you if you skip these practical habits that experienced woodworkers follow religiously:
- Invest in quality lumber. Cheap, warped, or green wood will fight you at every step. Spend a little more on kiln-dried, properly stored stock and your build will be dramatically easier.
- Sand progressively. Always work through grit levels—start at 80, move to 120, then finish at 220. Skipping grits leaves scratches that become visible under stain or paint.
- Measure twice, cut once. This old carpenter’s adage exists because it works. Double-check every measurement against the plan before making any cut.
- Keep a build journal. Document your process with photos and notes. This becomes an invaluable reference when you tackle the same or similar projects in the future.
- Do not rush the finishing process. Proper sanding, wood conditioning, and multiple thin coats of finish make the difference between a project that looks amateur and one that looks like it came from a boutique furniture maker.
Conclusion
Finding and following the right DIY carpentry plans is one of the most impactful decisions you can make as a woodworker. Whether you are building your very first simple shelf or tackling an ambitious custom furniture project, the right plan transforms raw materials into something lasting and meaningful. Start with projects that match your current skill level, invest in quality materials and tools, and always take the time to read the plan thoroughly before the first cut. Over time, as your confidence and technique grow, you will find that even the most complex woodworking project plans become approachable and deeply enjoyable to execute.
Frequently Asked Questions
Where can I find the best free DIY carpentry plans online?
Some of the most trusted sources for free carpentry blueprints include websites like Ana White, The Wood Whisperer, and Instructables, where community members share detailed build guides with photographs and measurements. Always cross-check the source’s reputation and read user reviews before committing to a free plan, as quality can vary significantly.
What are the easiest DIY carpentry projects for absolute beginners?
Simple projects like a wall-mounted coat rack, a basic wooden planter box, a floating shelf, or a small step stool are the best starting points. These builds require minimal tools, use affordable lumber, and introduce essential skills like measuring, drilling, and basic sanding without overwhelming you with complex joinery techniques.
How do I know if a DIY carpentry plan is well-written?
A high-quality plan should include clear exploded-view diagrams, a complete cut list with dimensions, a hardware and materials list, estimated build time, and step-by-step assembly instructions. If a plan lacks any of these elements, it is likely incomplete and may lead to frustration during the build process.
Can I modify DIY carpentry plans to suit my specific needs?
Absolutely. In fact, customization is one of the greatest advantages of working from custom wood build designs. Adjust dimensions to fit your space, swap wood species based on availability or budget, and modify joinery to match your tool collection. Just make sure to recalculate any measurements and material quantities before you start cutting.
What wood species are best for indoor DIY carpentry projects?
For indoor furniture and decorative pieces, popular choices include oak for durability and character, maple for a clean, modern look, walnut for rich color and fine grain, and pine for budget-friendly projects that can be painted or stained. Always consider the wood’s hardness, grain pattern, and how it accepts finish when making your selection.
Do I need expensive power tools to follow DIY carpentry plans?
While a table saw and router make certain projects faster and more precise, many beginner and intermediate plans are designed to be completed with basic hand tools and a drill/driver. Start with what you have, and invest in new tools gradually as your project scope and skill level grow. The best home carpentry guides will always specify exactly which tools are required for each build.